Whether you’re a college student or a corporate worker, PDFs are everywhere. Most books or essays available are PDFs, so it is important that you know how to play around with them. One of the things I have had to do from time to time as a student is split a PDF. Sometimes, you get the whole book and need to extract a chapter, or just remove an extra blank page that decided to show up when you were trying to submit an essay. Fortunately, the solution to PDF splitting woes is right in front of you. You just have to see it, and in this article, we will show you the easiest way to split PDFs using Google Chrome’s inbuilt print dialog. This tutorial will work for any computer with Google Chrome installed, including Windows, Macs, and of course, Chromebooks.
Usually, if you wanted to split PDFs, you would have to use an online tool like ilovepdf.com or splitpdf.com. These tools are perfectly fine if you have a really good internet connection, and your PDF is really small. However, these free sites will not split large size PDFs without a premium account, which costs money. Thankfully, you don’t need any of these online sites at all, because Chrome has a powerful tool that can split any PDF, no matter what size, and without requiring an internet connection or the painful upload/download process usually involved in using online PDF splitters.
If you are on Windows or OSX, you probably have Adobe Reader installed for viewing PDFs. Our trick requires that you open the PDF that you want to split on Chrome’s PDF viewer. To do this, you will have to right click on the PDF file, and select Open with > Google Chrome.

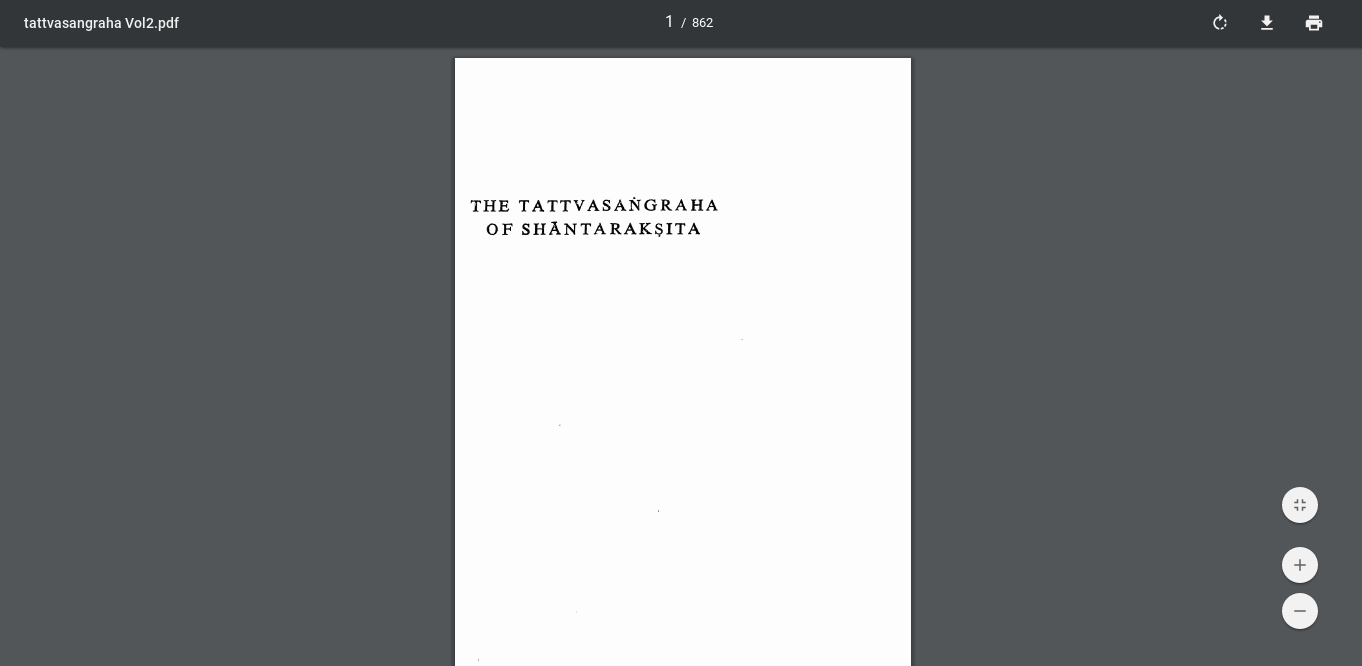
Your PDF should open in the Chrome PDF viewer, which will look like the picture above.
On the top-right corner of the viewer, you will spot a printer icon, which is the command to print the PDF. To proceed to the next step, you can click it, or alternatively press Ctrl + P on Windows (or command + P on a Mac).
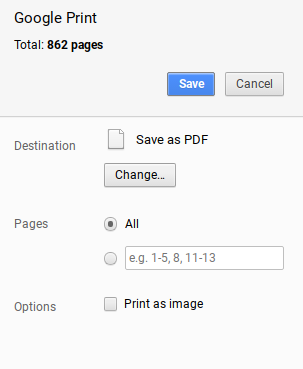
Chrome’s inbuilt print dialog box should pop-open, with a live preview of the document you’re printing. The first thing you need to do is make sure that the Destination of the dialog box is ‘Save as PDF’, as shown in the screenshot below.

If your printer is connected to the computer or registered with Google Cloud Print, then the Destination will not be ‘Save as PDF’ by default. In order to manually set the destination to Save as PDF, click on ‘Change’ in the Destination section.

From the list of Destinations available, choose ‘Save as PDF’.
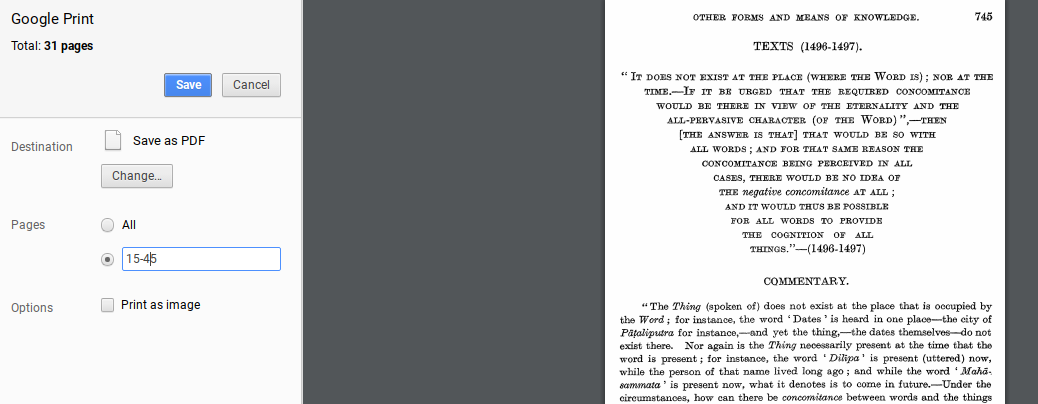
Once your destination is set, the next option is ‘Pages’. This is where the splitting comes in. By default, Pages is set to ‘All’, but you probably want to save a specific set of pages from the PDF. In order to do that, select the page numbers text field and enter the set of page numbers you want extracted. For example, if I want to extract pages 15-45, I will type ‘15-45’ on the text box and the print dialog will show a preview of those pages.

If you just want to extract one page, then type that page number and it will be extracted. All you need to do then is click ‘Save’.
The print dialog will ask you to choose a location, and then save your extracted PDF on that location.
That’s it. You now have a PDF splitter built right into Chrome. This is a really handy trick to keep in mind, and can prove to be very useful in certain situations.